Configuring the Laserfiche API for Use - Where Do I Begin?
- CDI
- Jul 26, 2024
- 4 min read

By Kyle Knebel
July 2024 Consultants Corner
The Laserfiche API is a set of “RESTful Web APIs” that allow for interaction with the Laserfiche repository and can even interact with LF Cloud Lookup tables. It works in both Cloud and Self-hosted environments. For Self-hosted environments, the API is part of the Server licensing, and for Laserfiche Cloud the API is part of your subscription. With custom integrations using the API, you can extend the Laserfiche platform into other areas of your business with ease. The Laserfiche API lends itself to building “Image Enablement” solutions like viewing or adding documents to the repository or viewing or modifying metadata on entries.
In this month’s article we will examine how to download, license and start using the API. We won’t be teaching coding skills, just getting you to the point to begin your coding adventure. Let’s take a look!
For Self-Hosted environments, download and install the Laserfiche API server.
Note: If you only have a Cloud subscription this step is not necessary.
On Laserfiche’s Developer website you’ll find links and instructions to download, install and configure the API server.
The links are here: https://developer.laserfiche.com/docs/api/server/
After extracting the installer files, run “Autorun.exe” to find the Documentation and installation menu. The current version of the API is 1.1 (July 2024).

The locally installed Laserfiche API Server includes a Swagger Playground site for testing the various API calls available. To begin, you’ll need to obtain an access token.
Expand the Token section, and then press” the “Try it out" button on the right side. Enter the parameters, which include a repository ID (name of your repository), login name and password. Finally, press the blue “Execute” button, which (if successful) will return the access token in the response body.


A successful response looks like this:

Copy this token, scroll to the top of the page, click the Authorize button, and paste into the Bearer field:

You can now test API calls, authenticated to your self-hosted repository.
For LF Cloud solutions, there is no installation needed.
However, you will need an application to be registered in the Cloud Developer console. There are three options:
Service App: runs as a service principal
Web App: prompts for user credentials
Single page app: a web application that runs entirely in a web browser
Please review the documentation carefully (https://developer.laserfiche.com/docs/api/authentication/) and consider the best approach for your intended use and capabilities.
Your own LF Cloud account needs the Developer Privilege to build apps in the Developer console.

Log in with your Cloud account and navigate to the Laserfiche Developer Console in LF Cloud.

On the top left, select Applications, then press the green New button at the top right side of the screen.

Select the type of application you are going to build. Service apps need a “Service Principal Account”, which takes the place of user credentials. The other two app types will collect the user’s credentials when they run.
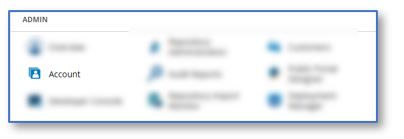
To create a Service Principal, if building a service-based app, navigate to the Accounts section of the Admin section.

Select “Add Service Principal”, give it a Username, then under Access rights Allow Access to the Repository.

Next, go to the Developer Console, and in the Applications area, press the green New button at the top right to begin creating your new application.

Select the app type. In this example we would choose “Service”, and then down in the Name box we would enter the name of the new application. Finally, press the green “Create application” button.

The next screen is App Configuration page where you will define the App’s name and set the Service Account you just created in the previous steps and set the Authentication properties.

In the Authentication tab, you’ll set two properties. The Access Key and the OAuth 2.0 properties.
A single key should be necessary. Create the key here.

For a Service-based app that doesn’t prompt for end-user credentials, it’s typical to select the first Access Key option.

Make sure the OAuth 2.0 Scopes are set appropriately for the application you will be coding and update the scopes with the green “Update scopes” button at the bottom of the screen.

Since the Authorization approach will vary depending on which application type you’ve chosen in Laserfiche Cloud, we recommend reviewing the documentation (https://developer.laserfiche.com/docs/api/authentication/) to familiarize yourself with the procedure for acquiring an access token.
So now, whether you are using a local API Server or using the LF Cloud API, you will be ready to build custom integrations with Laserfiche. We recommend using the Swagger site to explore and test the various API calls available, and consider using client libraries (which can be found here: https://developer.laserfiche.com/docs/api/libraries/) to aid in development. More information can be found on the Laserfiche Developer website here: https://developer.laserfiche.com/
Also, CDI recently posted an excellent tutorial video and tour of the Laserfiche API on our YouTube channel here: https://www.youtube.com/watch?v=3z9fFr0iUNs\
This concludes this month’s review of where to begin configuring the Laserfiche AI for use when building custom integrations. We hope you found this post informative and useful!

CDI NEWSLETTER
Stay updated with all the latest Laserfiche news, CDI webinars, blogs, and more!

Comentarios