

Forms Addict Alert - Configuring form data sources and CSS/JS
- CDI
- Feb 22, 2022
- 5 min read

By Kyle Knebel
February 2022 Consultant’s Corner:
This month we are going to spotlight two valuable and exciting features of Laserfiche Forms. The first feature we will review is Database Lookups. The second feature we will review is JavaScript. We’ll also look at the best practices for these options and discuss important items to think about when upgrading.
Laserfiche Forms comes in two basic “flavors”: the Essentials edition and the Professional edition. The Professional edition is included for all On-Premises installations if you have a Laserfiche RIO environment. If you have a Laserfiche Avante license, the Professional Edition is still available as an add-on option.
Database Lookups are included in Forms Professional only. For those with Laserfiche Cloud, Database Lookups function differently and will therefore not be discussed in this article.
All flavors of Laserfiche Forms have CSS (Cascading Style Sheets) and JavaScript functionality available out-of-the-box in the latest version.
Now that we have the basics, let’s get into the details.
Connecting to a Data Source
Once a process is associated with a data lookup source, while in that process, forms can access information in the data source to automatically fill out fields or suggest values to users. This follows best practices aimed at reducing error-prone and unnecessary manual data entry.
Any Forms Processes that have been added to the data source will have access to the source regardless of the user. This delegation of access is completed entirely in the background.
Note: You must have the System Administrator security role assigned in order to make these changes.
Here are the steps to configure a Data Source:
Step 1: Select the account drop-down at the top right corner, then choose Administration. (In this example the user is logged in as “Forms”)

Step 2: Select Data Sources from the System Settings option on the left side of the screen.

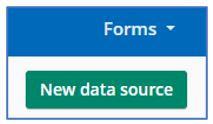
Step 3: Select the New data source button at the far right.
Step 4: The “New Data Source” dialog box will appear, ready for configuration.
Step 5: Enter the Name field of this data source you are creating.
Note: For some earlier versions of Forms, the name needs to be surrounded by double-quotes if it has spaces.

Step 6: Select the DBMS type.
Step 7: Next, you will have two choices, MS SQL Server, or ODBC. Select one.
As of Forms 10.2 the ODBC type is available. As per the Laserfiche help file:
Note: As of Forms 10.2 the ODBC type is available. As per the Laserfiche help file:


Fully supported ODBC drivers include: Microsoft Access Database Engine (supporting Excel, Access, CSV, and TXT), MSSQL, MySQL, PostgreSQL, Oracle, OpenEdge, IBM DB2, FileMaker, SoftVelocity Topspeed, and Pervasive. These drivers have been tested with Forms. While other ODBC drivers may work, they have not been tested, and may have potential issues.
Step 8: For ODBC, enter the Data Source Name or if you are using a SQL Server, enter the Server and Database fields.


Step 9: Enter the Account Name and Password.

Step 10: Select Test the connection.

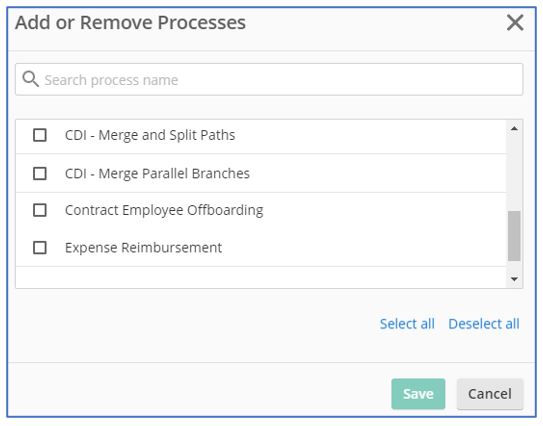
Step 11: Add your desired processes to this data source using the Add/remove processes button. This will allow the processes to use the source for lookups.

Step 12: Using the checkboxes on the left, select the processes that will use this data source and press Save.
Step 13: Now, in the Forms Designer, you will find the Data Source listed under the Form’s “Lookup Rules” tab.

Some Exciting Uses of Java Script
1. Use JavaScript to apply a phone number mask to a field.
JavaScript can be used to preselect the format in which you’d prefer U.S. phone numbers to display. When a U.S. phone number is entered into a field the user simply needs to input the numbers and the field will show as follows:

To set up the above, please follow the following steps:
a.) The field should be a Single Line field type.
b.) On the Advanced tab of the field, scroll down to the CSS Class field and enter the word “phone.”

c.) Then, click on the CSS and JavaScript tab of the form and insert the JavaScript below (see step d. for code to input) in the JavaScript box. Save and preview the form.

d.) JavaScript to add for phone number mask:
/* Mask single line input to autoformat for phone number (_)_-__ */
$(document).ready(function () {
//Download the script and apply the masks
$.getScript("***************************************", function () {
ApplyMask();
});
//Re-apply masks when the "Add" link is clicked * ONLY IF IN A COLLECTION*
$("<Collection ID>").click(ApplyMask);
});
function ApplyMask() {
//Loop through each input element with a parent containing the "phone" css clsas
$(".phone input").each(function () {
//Get the element and apply the mask
var el = $(this);
el.mask("(000) 000-0000", { placeholder: "(_) _-__" });
//Get the parent and remove the class
//This prevents the same elements from being found in future calls to this method
var parent = el.parent('.phone');
parent.removeClass("phone");
});
}
2. Use JavaScript to disable or enable the submit button if a radio button matches a condition of a field value.
JavaScript can be used to help regulate who can select Submit based on the option they pick in the radio button field. For example, if you do not want users who have selected “yes” to have the ability to submit you can hide the option altogether.

To set up the above, please follow the following steps:
a.) Under the Advanced tab, navigate to the CSS class field and enter “hideSubmit”.

b.) Then, click on the CSS and JavaScript tab of the form and insert the JavaScript below (see step c. for code) in the JavaScript box. Save and preview the form.

c.) JavaScript to add for disabling or enabling submit button:
$(document).ready(function(){
// apply event handler to radio inputs
$('.hideSubmit input').change(function(){
// if 1 or more YES selections are found
if($('.hideSubmit input[value="YES"]:checked').length > 0){
// hide submit button
$('.Submit').hide();
}
// otherwise
else{
// show submit button
$('.Submit').show();
}
});
});
CSS Class = hideSubmit
3. Use JavaScript to limit a date field to today’s date or earlier.
Limiting the date field will narrow the options available for users. This can help minimize the possibility of errors for users filling out your Forms and can be created using JavaScript.

To set up the above, please follow the following steps:
a.) Under the Advanced tab, add “MyDateFieldSelector” in the CSS class field.

b.) Then, click on the CSS and JavaScript tab of the form and insert the JavaScript below (see step c. for code) in the JavaScript box. Save and preview the form.

c.) JavaScript to add for disabling or enabling submit button:
$(function() {
$(document).ready(function () {
var todaysDate = new Date(); // Gets today's date
var year = todaysDate.getFullYear(); // YYYY
var month = ("0" + (todaysDate.getMonth() + 1)).slice(-2); // MM
var day = ("0" + todaysDate.getDate()).slice(-2); // DD
var maxDate = (year +"-"+ month +"-"+ day); // Results in today's date
// Now to set the max date value for the calendar to be today's date
$('.MyDateFieldSelector input').attr('max',maxDate);
});
});
We hope you found this article interesting and will find a way to put some of these ideas into your Forms in the near future!

CDI NEWSLETTER
Stay up to date with all the latest Laserfiche news, CDI webinars, blogs, and more!
Comentarios